Using Adams Explore with Adams View
The files required for this tutorial can be found in the Adams installation at: <install_dir>\aexplore\examples\aview. Copy them to your working directory.
1. Start Adams View.
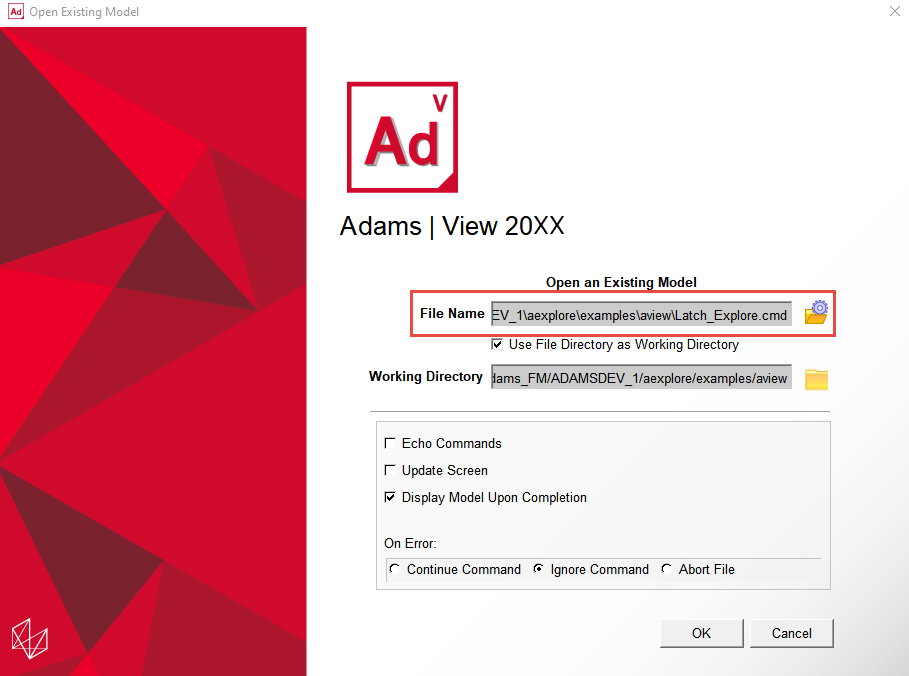
2. Select Existing Model from the startup screen.
.png)
3. In Open Existing Model dialog box, open the model "Latch_Explore.cmd" from the location where you placed the files accompanying this example.
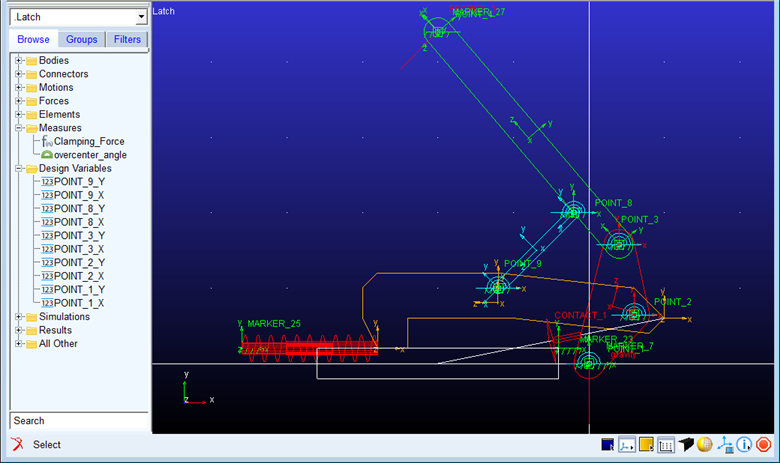
The model will be displayed as shown below:
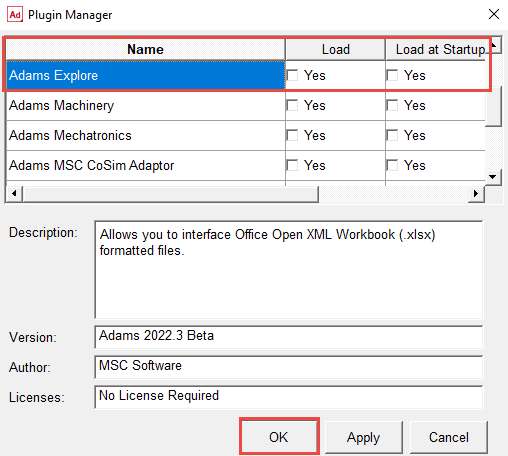
4. From the Tools menu, select Plugin Manager. In the list of plugin names, find Adams Explore, and then select one or both of the following:
■Load - Loads Adams Explore in the current session.
■Load at Startup - Instructs Adams View to load Adams Explore in all future Adams View sessions.
■Select OK.
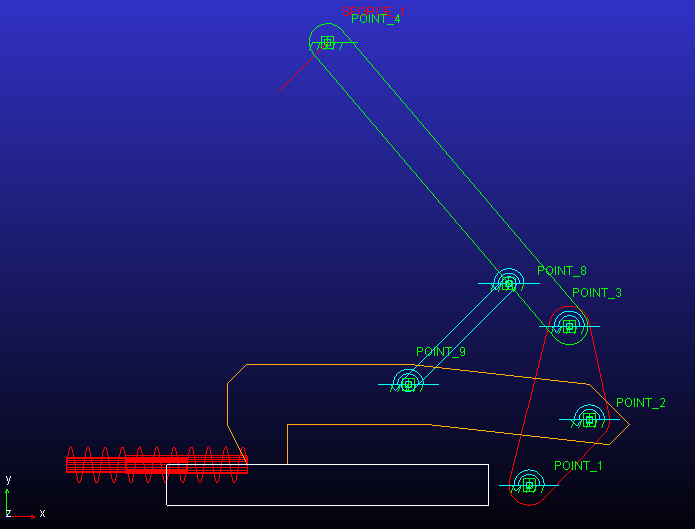
5. Using Adams View points whose coordinates are controlled by design variables, the model is parameterized so that the locations of key pivot points in the mechanism can be easily changed. These points (along with the 80N SFORCE representing the actuation at POINT_4) are shown below:
6. Click the the Design Exploration tab on the Adams View ribbon. From to the Explore container, click the Export icon:
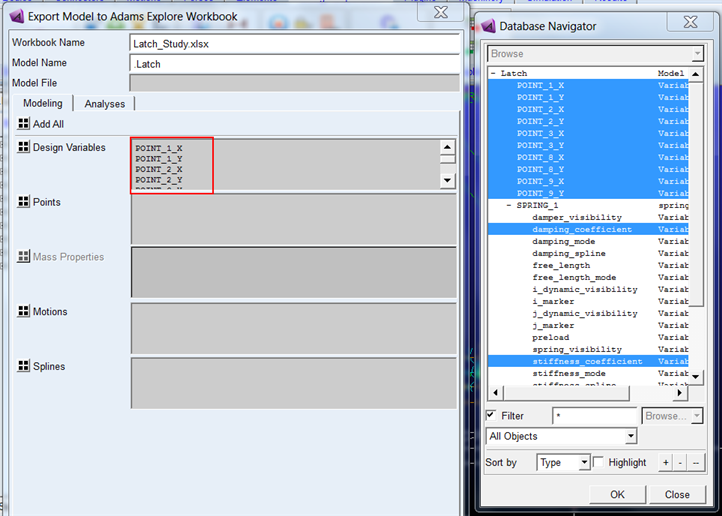
7. Specify the name of the workbook to be exported as “Latch_Study.xlsx” and select the model .Latch.

8. From the Modeling tab various modeling parameters can be chosen for inclusion in the exported spreadsheet. For this exercise select all the design variables pertaining to the hardpoint locations as well as the spring stiffness and damping variables by right-clicking in the “Design Variables” field and Browsing for the variable shown below. (do not click OK yet, you need to fill more tabs)
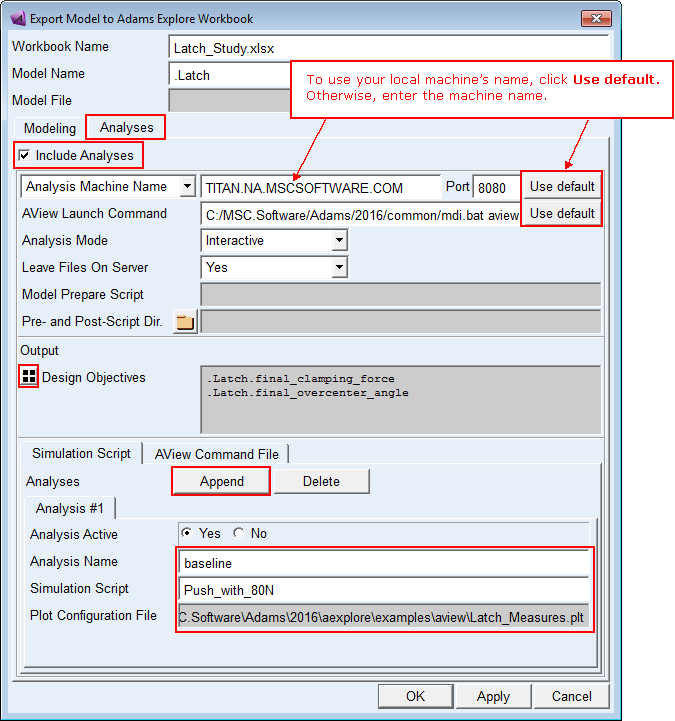
9. In the Analyses tab…
a. Select the option Include Analyses.
b. If you intend to use your local machine as the analysis machine on which spreadsheet-launched runs are to be performed, then click Use Default for the Analysis Machine Name and Port fields; otherwise, enter the name and port of the machine you intent to setup to accept spreadsheet-launched runs.
c. For AView Launch Command click Use Default or enter it directly if the command Adams senses for this installation does not match what you want to use.
d. Under Output select all Design Objectives in the model by clicking the select all button next to the field.
e. In Simulation Script tab, click Append and fill out the fields as shown below.
Hint: | Use right-click → Guesses to get the Simulation Script and right-click → Browse to get the .plt file |
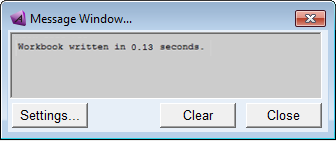
10. Click OK to export the spreadsheet workbook to your current working directory. You will get a message indicating this has been done.
11. From the machine you specified as “Analysis Machine” you need to start the Explore job server and web server so that analyses launched from the spreadsheet workbook can be built (that is, models modified) and executed:
a. Logon to the analysis machine and launch Adams View (of course, if you're hosting jobs this from the same machine from which you just exported the spreadsheet you have already done this)
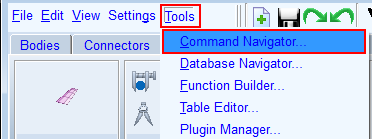
b. Launch the Command Navigator via Tools → Command Navigator
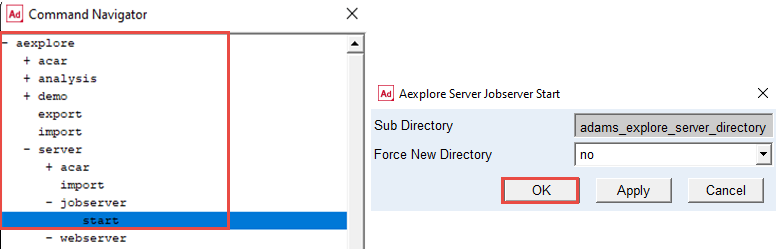
c. From the Command Navigator go to aexplore → server → jobserver and double click on start. In the Aexplore Server Jobserver Start dialog box, click on OK.
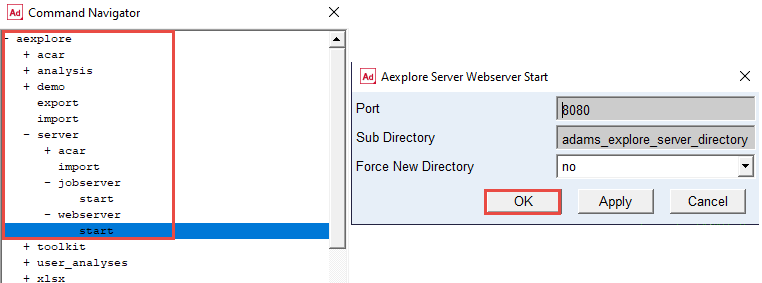
d. From the Command Navigator go to aexplore → server → webserver and double click start. In Aexplore Server Webserver Start dialog box, click OK (unless you know to be using some other port number than 8080, in which case enter that port number then click OK)
e. You will notice some command prompt windows open up logging status of the job server and web server.
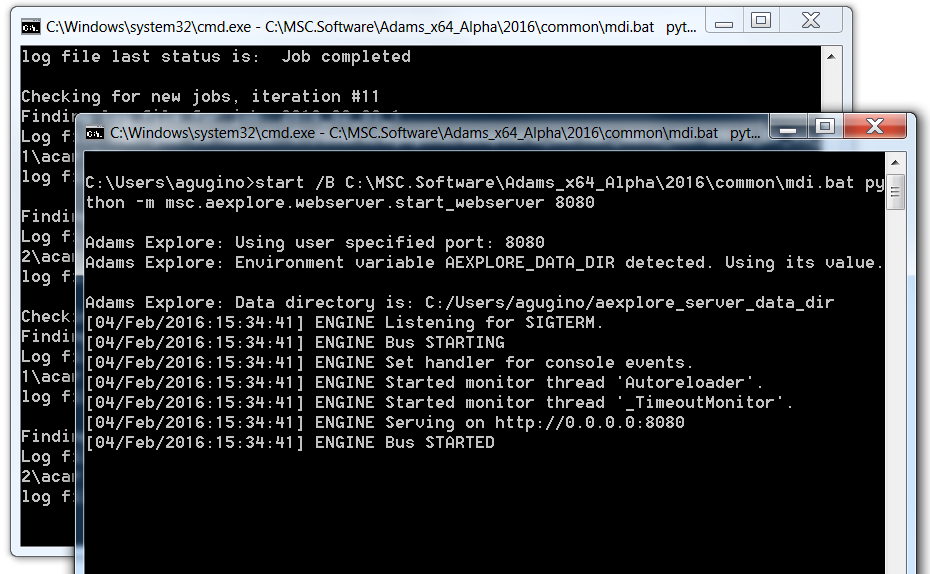
Important: | ■Keep these windows open. Closing them will stop the servers. ■Alternatively these servers can be started from the Adams Command Prompt. ■Launch the Adams Command Prompt. For example, from the Start Menu on Windows machines under Adams 20XX click Command Prompt ■Enter the Adams start command (shown at the top of the window, for example, adams20XX), followed by the arguments "aexplore" and "ru-jobserver" like so: 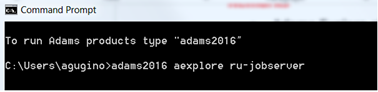 ■This will launch a separate window for the job server as shown earlier in this example ■Enter the Adams start command (shown at the top of the window, for example, "adams20XX"), followed by the arguments "aexplore" and "ru-webserver" like so: 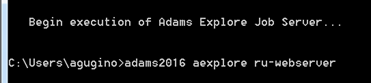 ■This will launch a separate window for the web server as shown earlier. |
12. If on a Windows OS machine using Excel, a one-time installation of an Excel 'Add-In' can be performed which will enable the Excel user to launch Adams analyses and retrieve results without ever leaving Excel.
Note: | If you are using a spreadsheet program other than Excel (for example, on a Linux OS) please see the tutorial Using the Webpage Job Monitor with Adams View. |
a. Locate the Add-In file in your Adams installation. This file is named adams_explore_addin.xlam and is located in the “<install_dir>\aexplore\spreadsheet_software_plugins\Microsoft_Excel” directory. For example, on a Windows installation for Adams version 20XX the example files are placed in the following location:
C:\Program Files\MSC.Software\Adams\20XX\aexplore\spreadsheet_software_plugins\Microsoft_Excel\adams_explore_addin.xlam
b. Copy the adams_explore_addin.xlam file into the \AppData\Roaming\Microsoft\Addins found in your User Profile folder on Windows. To find your User Profile directory, copy this text and paste into Windows Explorer, as shown:
%USERPROFILE%\AppData\Roaming\Microsoft\AddIns

c. Paste the adams_explore_addin.xlam file into this folder.
d. Next, open Microsoft Excel and load a blank file.
e. In Excel, navigate to: File → Options
f. In the Excel Options dialog box, select Add-Ins
g. Ensure that the “Manage:” selection at the bottom of the screen is set to “Excel Add-Ins” and then select the Go button.
h. The Add-Ins dialog box should list the Adams_Explore_Addin. Select the check box against it and then click OK.
i. A new Ribbon Bar should appear in Microsoft Excel named Adams Explore Server, as shown:

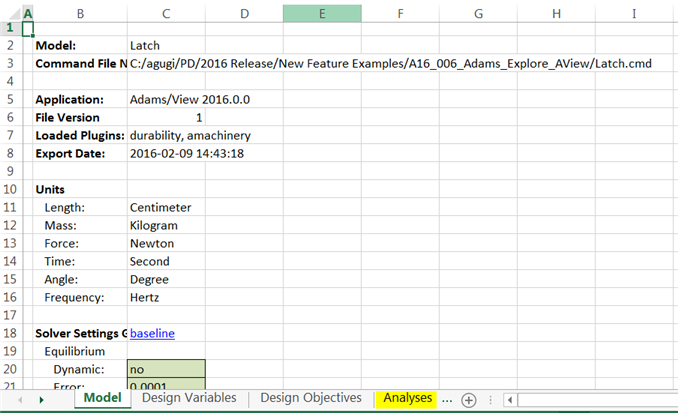
13. Navigate to your Adams View working directory and open the exported workbook file Latch_study.xlsx. Browse through the tabs to see the information you exported. General model information is presented in the Model tab and the other tabs reflect the information requested to be exported.
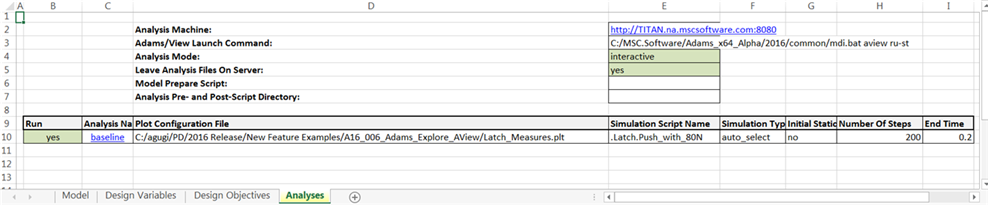
14. In the Analyses tab you'll notice the details of the analysis machine and the simulation script that were specified.
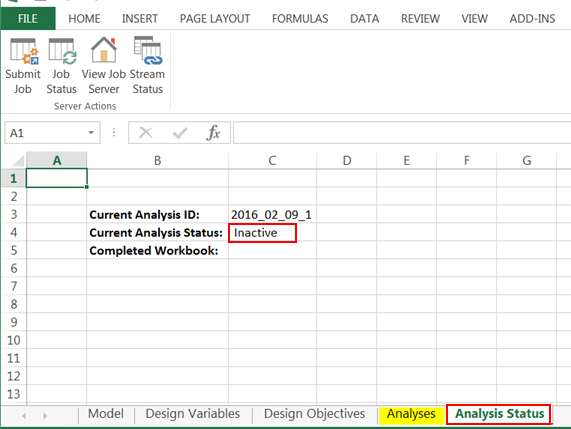
15. To run this analysis, from the "Adams Explore Server" tab in the Excel ribbon click on "Submit Job"

This will create a new tab in the Excel workbook called "Analysis Status" which will display the very initial status as "Inactive"
You can then manually query the status via the "Job Status" button above or have the spreadsheet automatically update the status every 10-seconds via the "Stream Status" button.
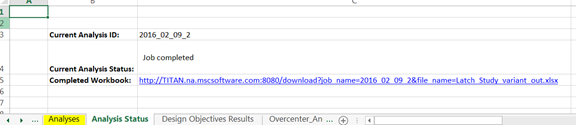
16. Once "Current Analysis Status" reads "Job completed" there will be a hyperlink from which the completed workbook (that is, one which includes the results of the analysis) can be downloaded (you may need to click through a warning about opening a non-local file):
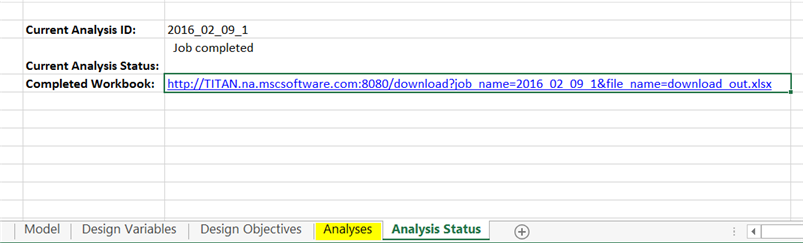
17. Once opened, save this locally (for example, to the directory from which you are running this example) as "Latch_study_baseline.xlsx"
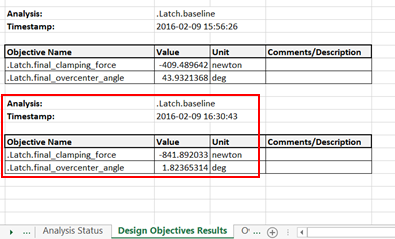
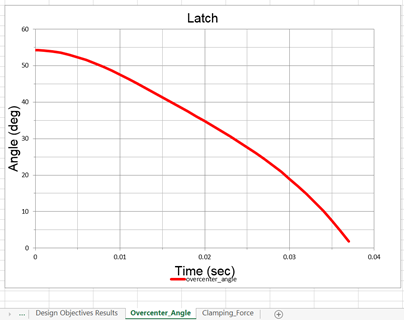
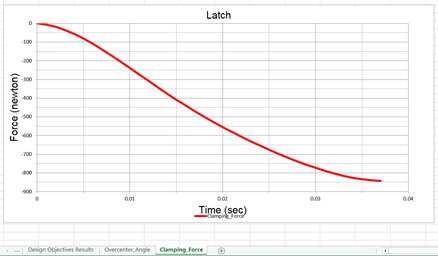
18. Browse through the result tabs showing the design objective values and the plots defined in the plot configuration file.
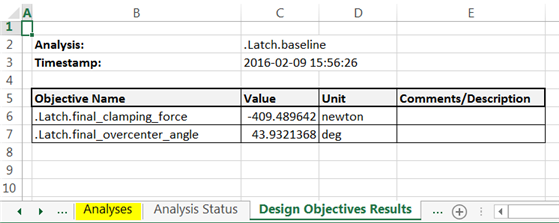

Note: | If you scroll down below each plot you will find columns containing the data points for each curve. |
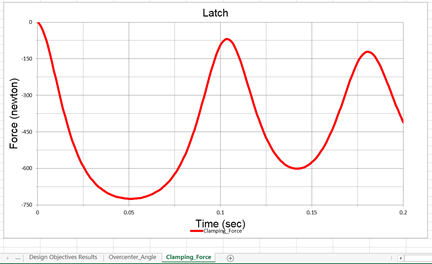
19. This baseline configuration does not meet our objectives. The clamping force fails to reach -800N and the 'overcenter' angle should reach near zero indicating that the latch was able to be fully engaged via the 80N applied force at the handle. What happened here is that spring overpowered the 80N applied force causing the harmonic nature of the curves away from our targets.
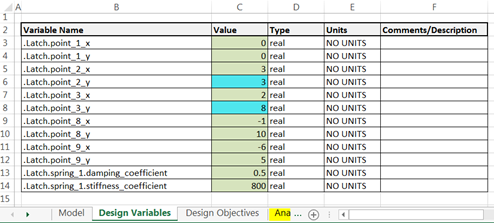
20. So, let's try an alternate configuration of the some of the key design points. Go to the "Design Variables" tab and edit point_2_y = 3.0 and point_3_y = 8.0. Throughout the spreadsheet editable cells are green and turn tuirquoise when modified:
21. Save the workbook under a new name, “Latch_Study_variant.xlsx”
22. Go to the “Analysis” tab and from the Excel ribbon's “Adams Explore Server” tab click “Submit Job”

23. After a moment click “Job Status” and once “Current Analysis Status” reads “Job completed” click on the “Completed Workbook” hyperlink to view the new results:
24. Now inspect the new results. Since you supplied a workbook with results from the first run present, a second design objective table has been added (you may need to scroll down to find it). The plots are simply overwritten; in the future, cross-plotting and/or appended plot tabs will be provided. Notice that now both design objectives meet our targets: the clamping force is beyond -800N and the overcenter angle is near zero.
25. Optionally save this workbook locally to your exercise directory as “Latch_Study_variant_out.xlsx”
Note: | Adams Explore also allows you to edit an Adams model based on the values of an .xlsx file previously exported against the same model. So, in the above example, the Adams analyst could update the latch model with the better configuration found by the engineer in the .xlsx file using the import button on the ribbon tab:  |