Steps for Running Example
Here are the steps used to translate a .R2A file...
1. Start Adams View.
2. Click File → Import → Romax Model (.R2A)…
3. Fill out the dialog as shown below and click OK
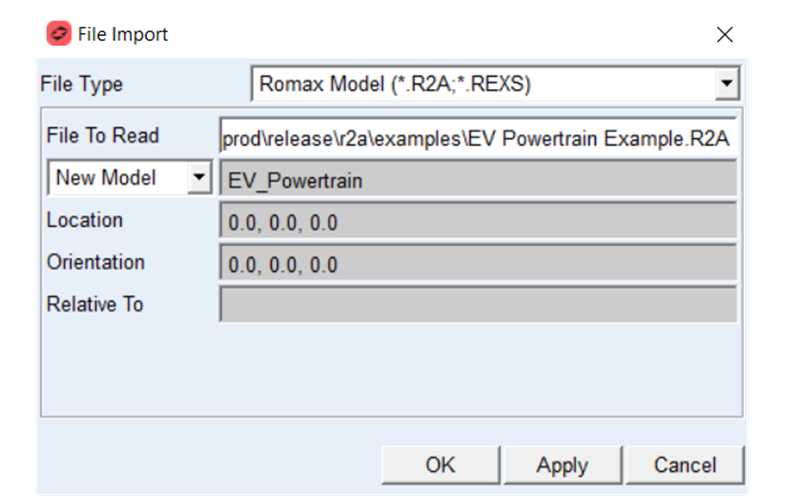
Note: | You can directly specify .REXS file to create Adams model out of it. Upon selection of the REXS file, your installation of the Romax software is run behind-the-scenes to convert the REXS file to the R2A file format, then that R2A file used by the Romax to Adams converter. |
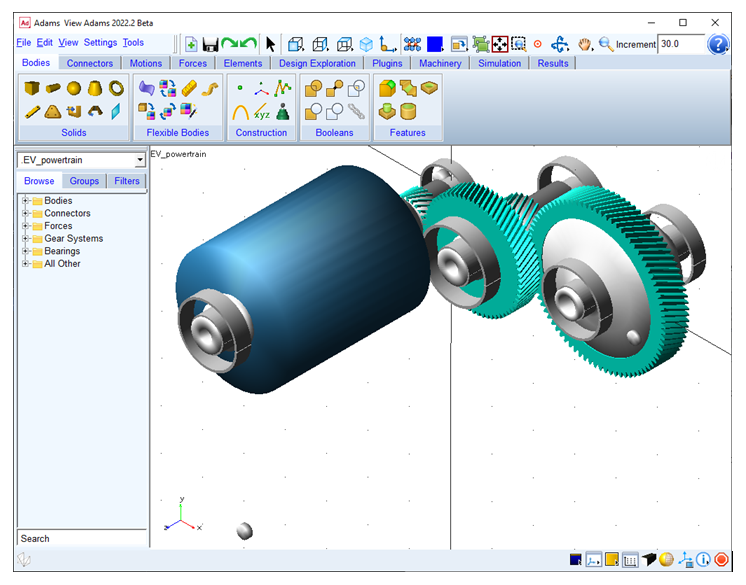
4. After completion of the import you will get the model shown below. You can set view to isometric and shaded turned on.
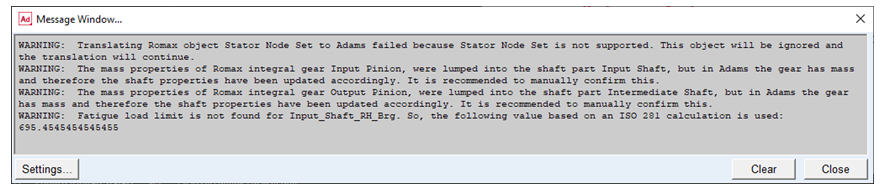
5. While importing you will get a few warnings and info messages which are visible in Message Windows and in the aview.log file.
6. Review files in the working directory, you would notice that…
a. Gear AT and Bearing AT property files were created during translations for gear and bearing objects. This would help to convert Adams Machinery Gear or Bearing objects manually to Gear AT or Bearing AT objects for even higher fidelity modelling.
b. In the Adams 2023.4 version and onward, a separate log file gets created that includes information about translation of the Romax model to Adams model and can be useful for future reference just like how the “aview.log” file accumulates other information when you work on the model.
7. Before you simulate model, you need to apply actuation (Motion) to the model using the “Powerload” marker created on the part “Electric_Machine_Rotor”.
Motion and torque actuators are created during translation at both input and output powerload and are set to deactivated state. You can activate it as per your requirement.
Here steps are given to add motion actuators.
■Select Point Motion from Motion tab under Ribbon
■Select Construction as 2 Bodies - 1 Location : Pick Geometry Feature
■Select Rotation as Characteristics.
■Select Electric_Machine_Rotor and Gearbox_Housing as 2 Parts
Note: Gearbox housing doesn’t have graphics, so turn on the visibility of icons to select it.
■Select i_power_input_marker_1 marker location and select Z axis to select direction vector.
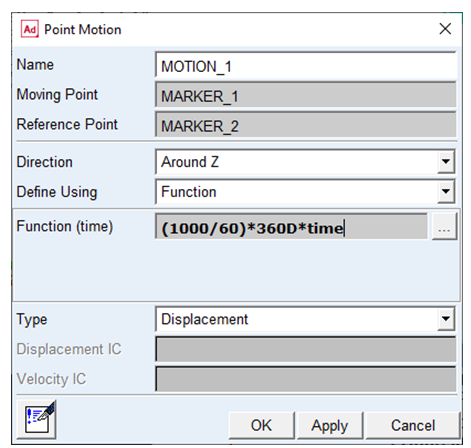
■Modify MOTION_1 and set the Function (time) to (1000/60)*360D*time and click OK. This will rotate the rotor at 1000 RPM.