Tutorial: Simple UDE
Overview
In this tutorial you will create a simple UDE definition inside an Adams View library and build an instance of that UDE within an Adams View model. The UDE will consist of a spring damping connecting two spherical parts. The UDE instance you create here can be connected to other entities in a model. This tutorial makes use only of the "ude create definition" and "ude create instance" commands. No dialog boxes are available for the user to change anything within it. To do this, macros are required, which are covered in Tutorial: UDE with Macro section.
Steps to Run this Tutorial
1. Launch Adams View and choose New Model.
2. In the "Create a New Model" dialog accept the defaults and click OK.
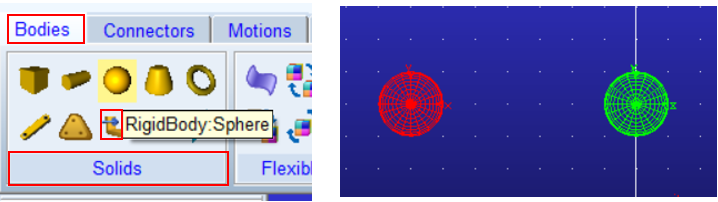
3. Create two spherical parts via the Adams View ribbon: Bodies → Solids → Rigid Body:Sphere
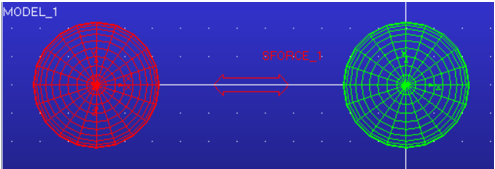
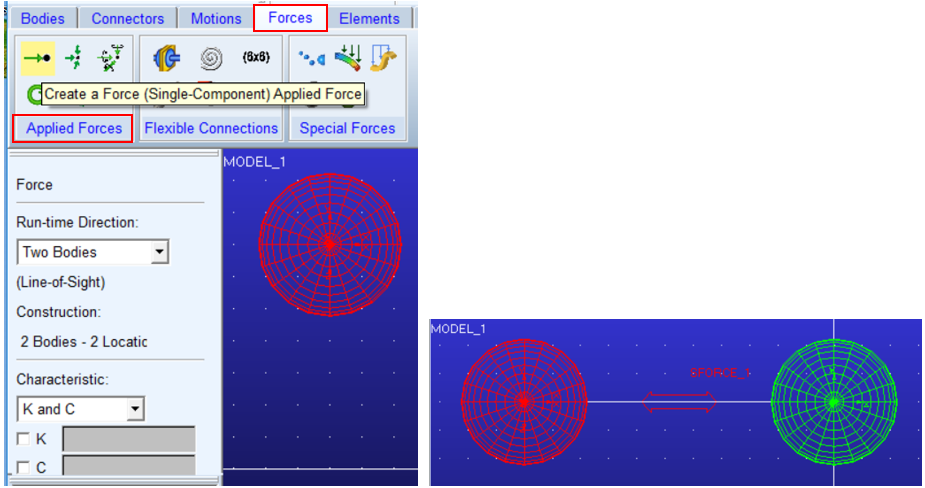
4. Connect the two spherical parts with a single component force between their centers via the Adams View ribbon: Forces → Applied Forces → (Single Component) Applied Force. For "Run Time Direction" use the Two Bodies option and set "Characteristic" to K and C.
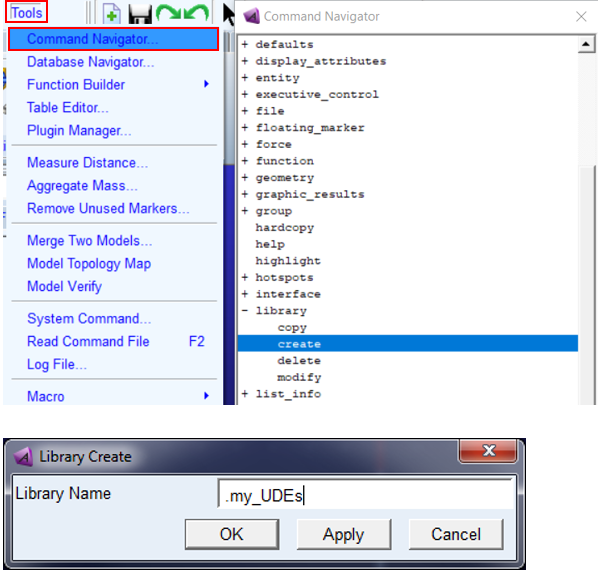
5. Create a library to hold the UDE we will create. Do this via Tools → Command Navigator→ Library → Create and for "Library Name" enter .my_UDEs then click OK.
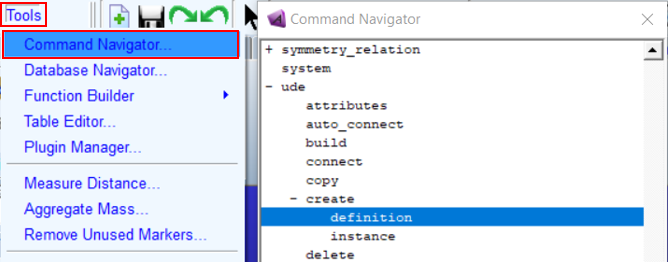
6. Open the UDE definition creation dialog via Tools → Command Navigator → UDE → Create → Definition.
7. For "Definition Name" enter ".my_UDES.ude1" and for "Objects" browse for both parts and the spring.
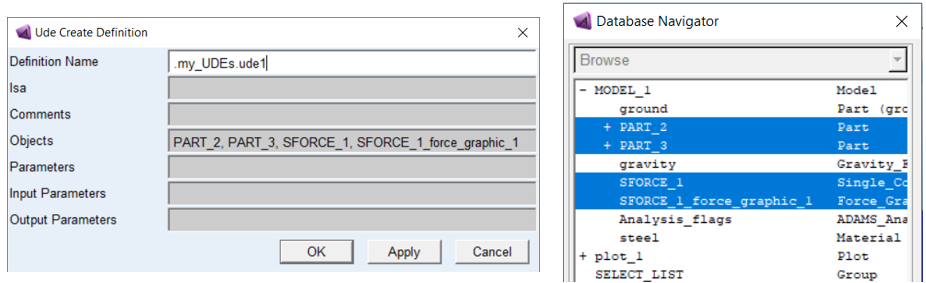
8. Click OK from the "Ude Create Definition" dialog and notice that the part and spring objects will disappear from the main modeling window.
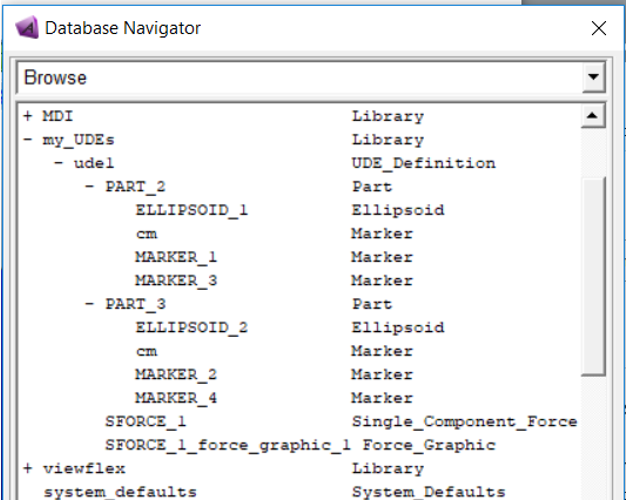
9. You will now see your UDE in Database Navigator under the library you created above:
Note: | We could have also created the definition via the Adams View Command Language: ude create definition definition_name = .my_UDEs.ude1 objects = <desired objects> |
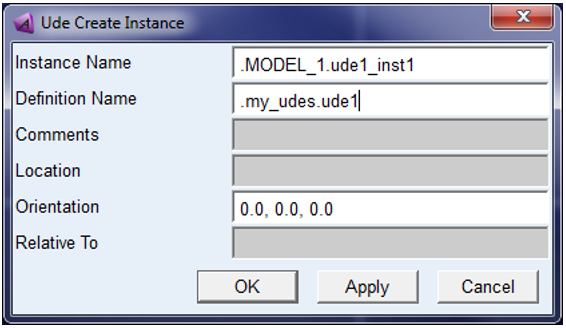
10. Now to create an instance of this UDE, use Tools → Command Navigator → UDE → Create → Instance. Enter an "Instance Name" and for "Definition Name" choose the UDE Definition you just created:
Note: | We could have also created the instance via the Adams View Command Language: ude create instance instance_name = .model_1.ude1_inst1 definition_name = .my_udes.ude1 |
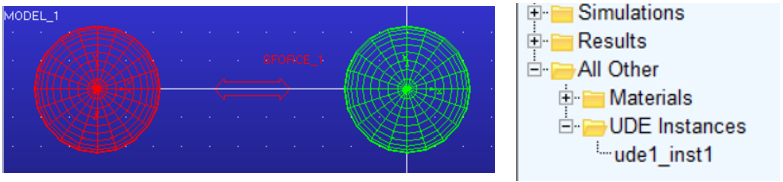
11. You will now see an instance of the UDE in the main modeling window. It will also be shown in the model browser:
Tutorial Remarks: What can I do with this UDE instance?
■You can create multiple instances of this UDE, but you cannot modify any of the parameters within it
■Even if you had referenced a design variable in the UDE, and then changed the value of that design variable, the UDE would not reflect the change
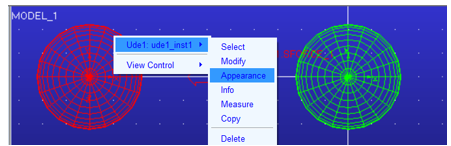
■If you try to use "Modify" on the UDE, you get:

■About all we can do is modify its appearance
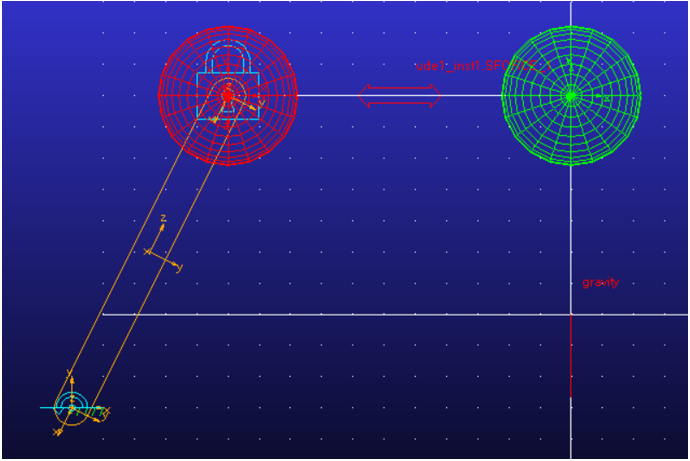
■However, if you try to connect things to this UDE (forces, joints and so on.), Adams View will recognize objects within the UDE. Below a fixed joint has been created on one of the parts in the UDE, and one could create a force on the other.
■The important thing to note is that by only using the "ude create definition" and "ude create instance" commands like you did here, no dialog boxes are available for the user to change anything within it. To do this, macros are required, which are covered in Tutorial: UDE with Macro section.