Tutorial: UDE with Macro
Overview
In this tutorial you will create a UDE definition inside an Adams View library and build an instance of that UDE within an Adams View model. The UDE will consist of a spring loaded piston-cylinder style actuator. You will make use of create ad modify utility macros and a dialog box method macro so that you can apply the UDE throughout a model and supply it connection markers from a model. To learn more about using macros with UDEs please see, Using Macros with UDEs.
Steps to Run this Tutorial
1. Copy the tutorial files from the directory in which Adams was installed, <topdir>, and paste them into a folder on your machine to use as a working directory. The files can be found in <topdir>\aview\examples\ude
2. Launch Adams View, choose Existing Model and, from the files just copied, select "Actuator_Model.cmd"
3. Create the UDE definition via Tools → Command Navigator → UDE → Create → Definition completing the dialog box as shown below and click OK.
Tip: | To pick objects or parameters, right-click in the field and select All - Browse. Then use Ctrl + right-mouse-button to pick the objects or parameters from Database Navigator |
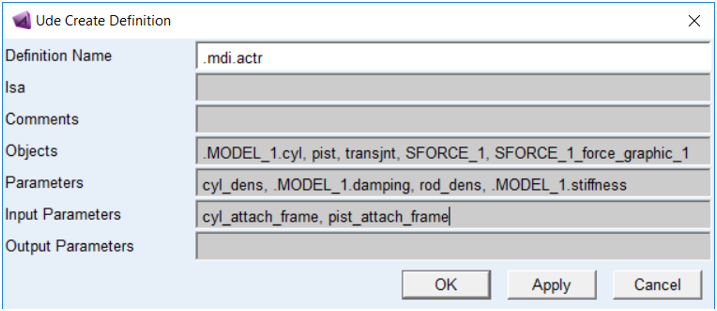
Note: | The actuator objects will disappear from the model, MODEL_1 |
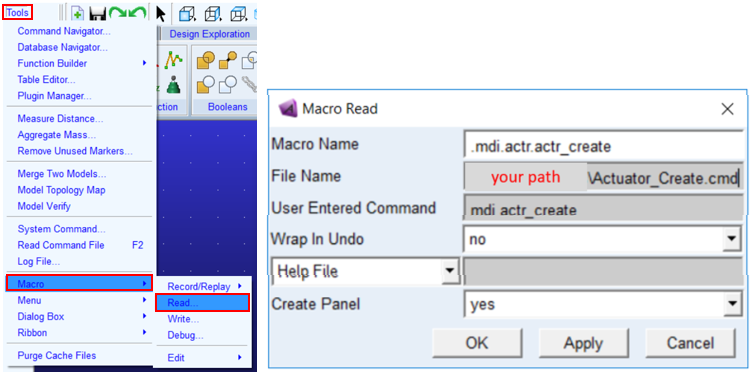
4. Create a "UDE Create" utility macro via Tools → Macro → Read and fill out the dialog as shown below.
a. Macro Name = .mdi.actr.actr_create
b. File Name: choose the file Actuator_Create.cmd from the set of files you copied in step 1
c. User Entered Command = mdi actr_create
d. Wrap in Undo = no
e. Create Panel = yes
5. Similarly, via Tools → Macro → Read, create a "UDE Modify" utility macro, choosing the file Actuator_Modify.cmd from the set of files you copied in step 1.

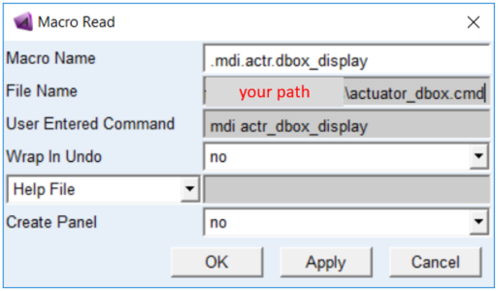
6. Also, via Tools → Macro → Read, create a "Dialog Box" method macro in a similar fashion, choosing the file actuator_dbox.cmd from the set of files you copied in step 1.
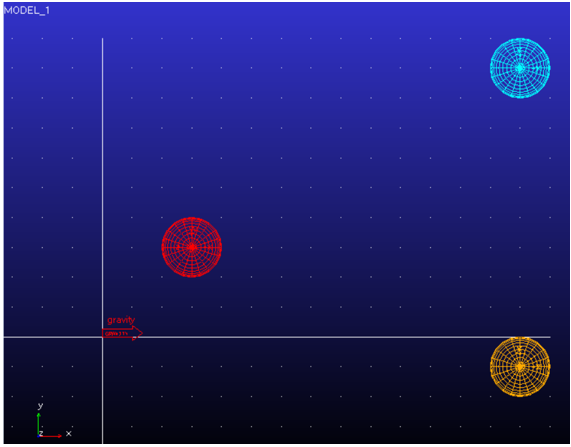
7. In your model, MODEL_1, create three spheres in roughly the locations shown below:
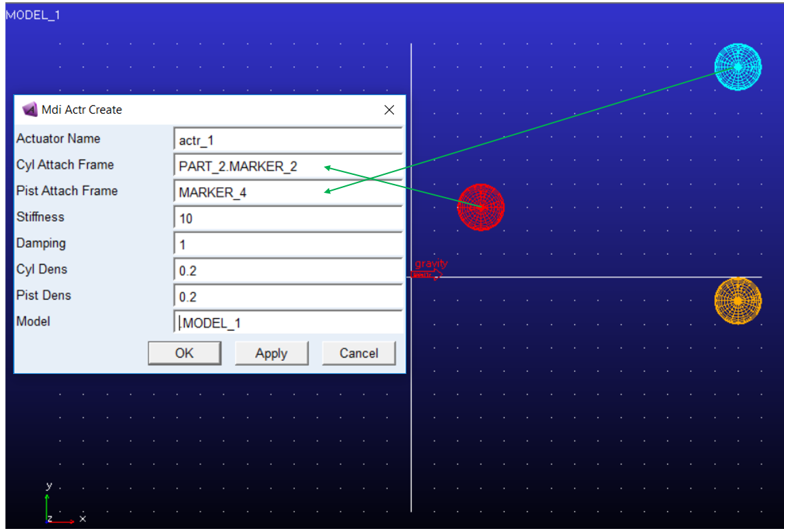
8. Launch the UDE instance creation dialog via Tools → Command Navigator → mdi → actr_create:

9. Complete the dialog as shown below and click "OK". For "Cyl Attach Frame" choose the center of the leftmost sphere (that is, sphere located at lowest X value). For "Pist Attach Frame" choose the center of the upper right sphere (that is, sphere located at highest Y value).
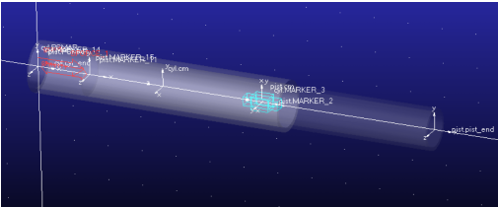
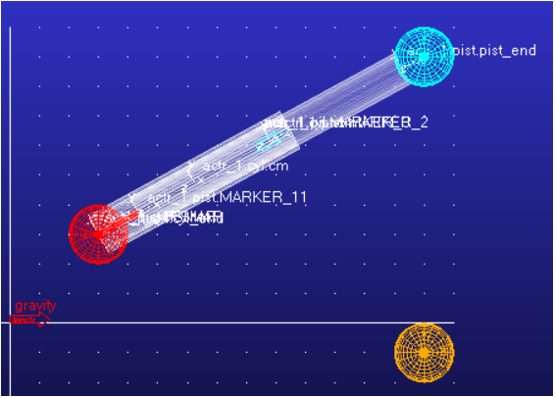
10. You should now see an actuator instance between the two spheres:
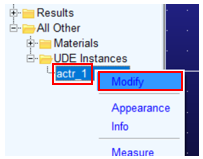
11. In the model browser, select the UDE instance, right-click and choose "Modify"
12. In the modify dialog enter the values as shown below the same as when you created the instance but this time for "Pist Attach Frame" specify the center of the sphere in the lower-right (that is, located with the greatest X and lowest Y values).
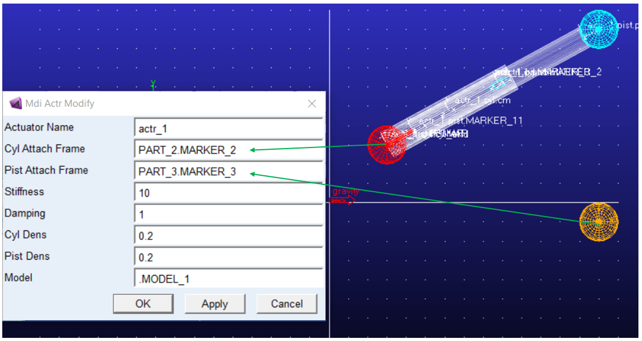
Notice that you had to re-enter all the parameters. You could include commands in the macro that reads current values of the instance and then writes them to the dialog box fields whenever it is opened.
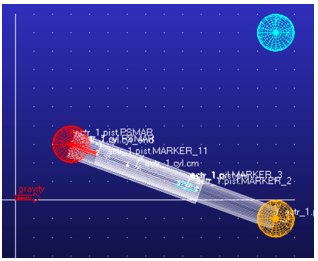
13. After clicking OK in the Modify dialog, you will see the actuator is now oriented along the line from the left sphere to the lower-right sphere.
Notes: | ■The actuator will likely not end exactly on the center off the lower-right sphere because we have implemented our UDE to always have the same length. The location is determined by the Cyl Attach Frame marker and only the direction is determined from Pist Attach Frame. ■While we used the input markers to determine where to position the UDE, we did not set up the UDE to attach to any external parts, although we certainly could have. |
Optional Steps
14. Delete the, now unused, sphere in the upper-right
15. Create a fixed joint between the leftmost sphere (red sphere in these images) and ground
16. Create a fixed joint between the actuator UDE's cylinder part and the leftmost sphere (red sphere in these images) located at the center of the leftmost sphere. When prompted to choose the first part, hover over the cylinder and pick actr1.cyl
17. Create a fixed joint between the actuator UDE's piston part and the lower-right sphere (maize sphere in these images) located at the center of the lower-right sphere. When prompted to choose the first part, hover over the cylinder and pick actr1.pist
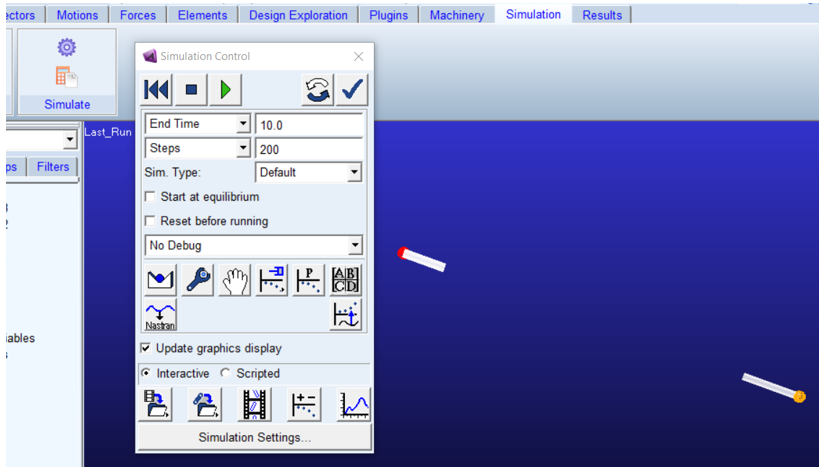
18. Run a 10 second, 200 step simulation and animate