Starting Adams View and Importing the Model
In this section, you learn how to start Adams Vibration from within Adams View.
In the Linux environment, you start Adams View from the Adams Toolbar and then, from within Adams View, you load the Adams Vibration plugin.
In the Windows environment, you start Adams View from the Start menu, and then load the Adams Vibration plugin.
For information on starting Adams, see the Running and Configuring online help.
To start Adams and import your model:
1. Create a working directory, and copy the contents of install_dir/vibration/examples/tutorial_satellite to that directory (where install_dir is the directory where Adams Vibration is installed).
Note: | On Windows, you may need to set the permissions to Full Control to edit the tutorial files. |
2. Do either of the following depending on the platform on which you are running Adams View:
■In Linux, type the command to start the Adams Toolbar at the command prompt, and then press Enter. Select the Adams View tool  .
.
.■In Windows, from the Start menu, point to Programs, point to Adams 2024.1, and then select Adams View.
The Welcome to Adams (Classic Interface) dialog box appears, in the Adams View main window.
3. Select Import a File.
4. Select the Find Directory tool  next to the Start in text box. This displays the Find Directory dialog box.
next to the Start in text box. This displays the Find Directory dialog box.Note: | The Start in text box specifies the working directory that Adams Vibration uses as the default directory for reading and writing files. |
5. Navigate to the working directory that you created in step 1.
6. Select OK.
This ensures that all your work gets stored in the working directory you selected.
7. Select OK.
The File Import dialog box appears.
8. Right-click the File to Read text box, and select Browse.
9. Select the file satellite.cmd.
10. Select OK.
Adams View opens the satellite model and displays it, as shown in Figure 1.
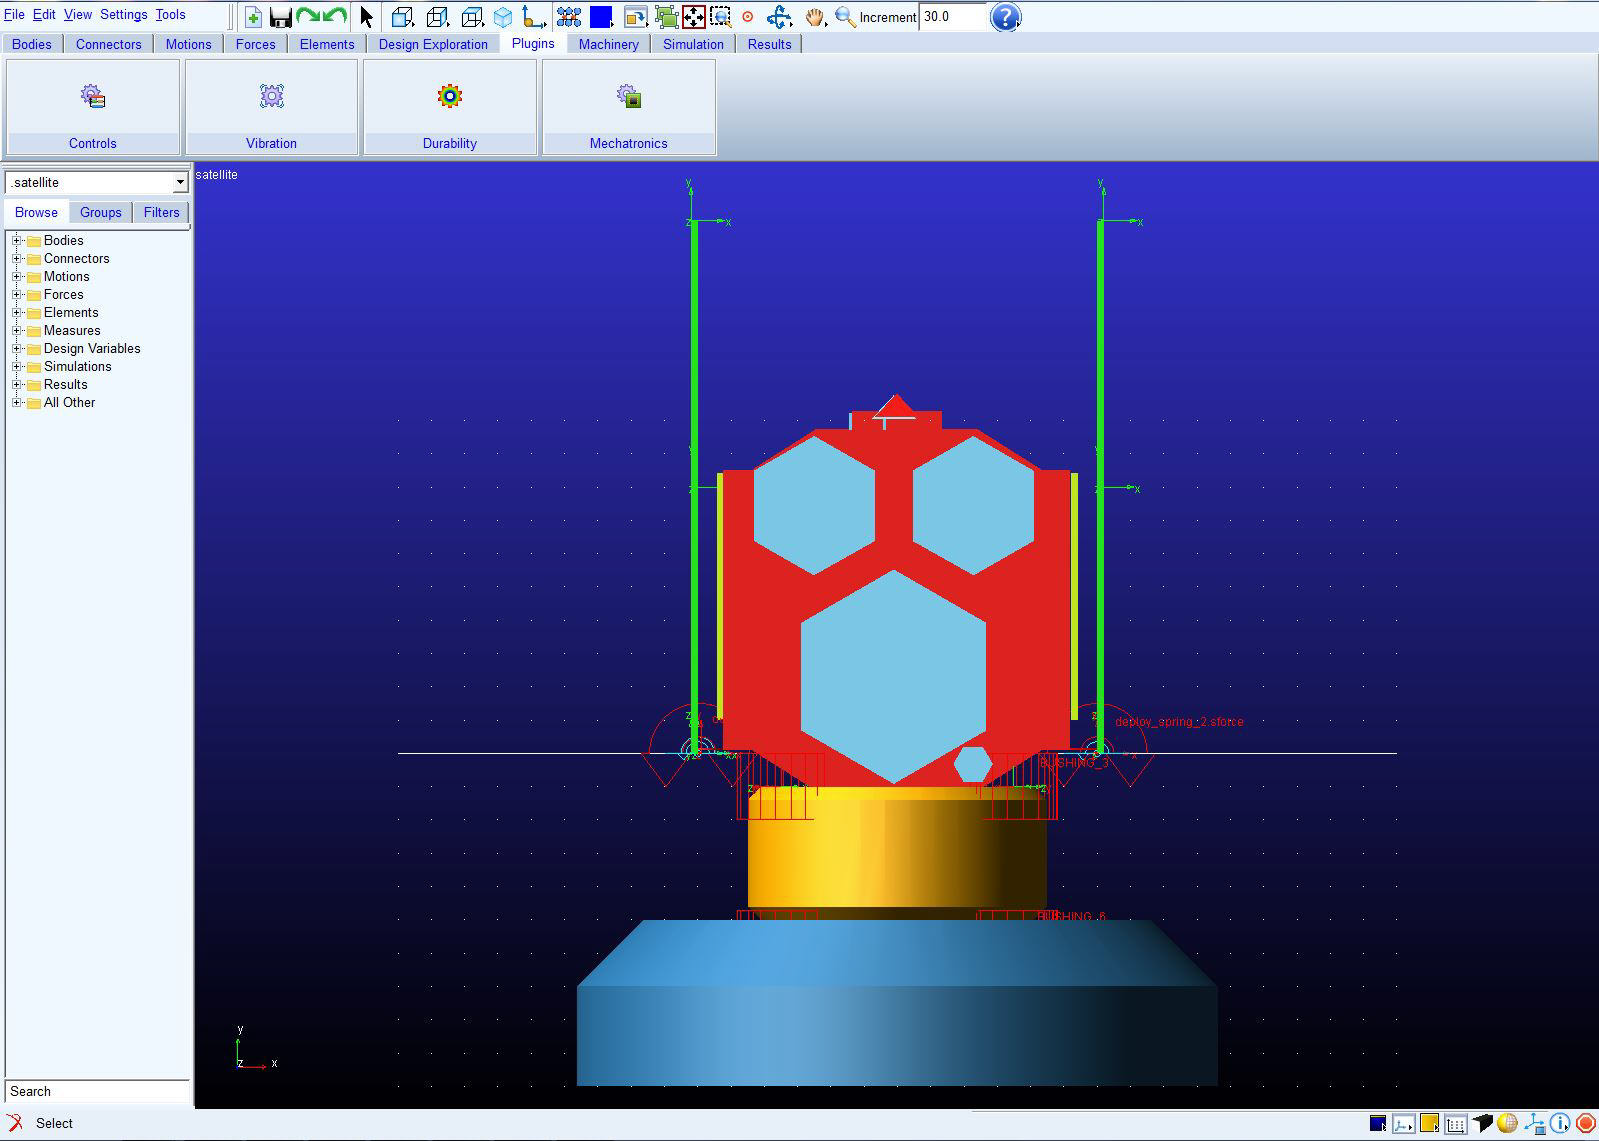
Figure 1 Satellite