Creating a Custom Dialog Box
You now create a custom dialog box to use in adjusting the downward force and the release force. You do this by:
To create a custom dialog box:
1. From the Tools menu, point to Dialog Box, and then select Create.
The Dialog-Box Builder appears.
2. From the Dialog Box menu, select New.
The New Dialog Box appears.
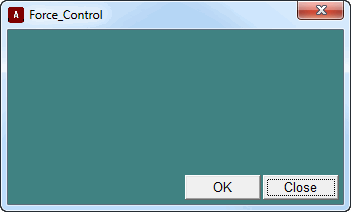
3. In the Name text box, enter Force_Control.
4. From the Create Buttons option, select OK and Close.
5. Select OK.
Adams View displays your custom dialog box:
Adding Objects to Your Dialog Box
In this section you add two sliders to your dialog box and you label the sliders. The sliders let you set a value from a continuous range of possible values, as detailed in the next section.
To add sliders to your dialog box:
1. Activate the Dialog-Box Builder.
2. From the Dialog-Box Builder Create menu, select Slider.
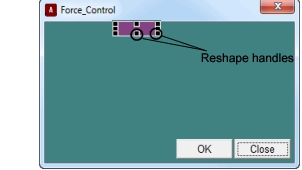
3. Inside your dialog box, click near the top center area of your dialog box, which is where the slider should appear, as shown in .
4. Double-click on the slider to select it.
5. Drag the reshape handles to resize the slider.
6. Create another slider underneath the first one.
7. Resize this slider to match the size of the first slider.
To label the sliders:
1. From the Dialog-Box Builder Create menu, select Label.
2. Inside your dialog box, click to the left of the first slider, which is where the label should appear, as shown in .
3. Double-click on the label, to select it.
4. Set the Dialog-Box Builder Attributes option menu to Appearance.
5. Replace the contents of the Label Text text box, with Down Force Value.
6. Select Apply to make the change in your dialog box.
7. Use the reshape handles to resize your label.
8. Create another label, Up Force Value, to the left of the second slider.
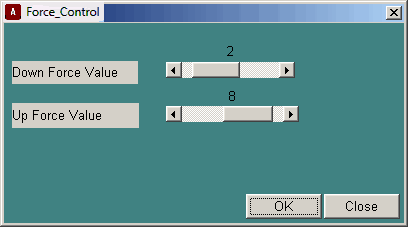
Figure 1 Force Control Dialog Box
Assigning Commands to the Sliders
You can assign commands to the sliders you just created to perform the functions you need.
To assign commands to the sliders:
1. Double-click the Down Force Value slider, and then from the Dialog-Box Builder Attributes pull-down menu, select Commands.
2. At the bottom of the Dialog-Box Builder, select Execute commands while sliding.
3. In the command window, enter variable modify variable=.Latch.DV_11 real=$slider_1.
The command sets the variable value of DV_11, the variable assigned to the down force value, to be equal to the slider selection.
4. Select Apply.
5. From the Dialog-Box Builder Attributes option menu, select Value.
6. Set the Value of the slider to 80, the Min. Value of the slider to 60, and the Max. Value to 90.
This matches the range of values that was automatically set for DV_11 when you created it. If you want to open up the range to different values, you need to first modify the set of allowable values for the design variable.
7. Select Apply.
8. Repeat the above seven steps for the Up Force Value slider, replacing the command for this slider with variable modify variable=.Latch.DV_12 real=$slider_2.
Make sure you use the numerical values you assigned when creating the design variable used for this slider (Value = 10, Min. Value = 0, Max. Value = 20).
9. Select Apply.
Testing the Dialog Box
Use the Test Box command to keep the Dialog-Box Builder open and operational in test mode. When the dialog box is in test mode you can issue commands from it, but you can also quickly go back to edit mode by selecting Test Box again or double-clicking on the dialog box background.
To test the dialog box:
■From the Dialog-Box Builder Options menu, select Test Box.
Saving Your Dialog Box
Save your dialog box in a command file. In Adams View, a command file is simply a file that contains a set of Adams View commands. Even if you don’t save your dialog box to a separate command file, you can still access it through the Database Navigator.
To save your dialog box:
1. To enter edit mode, double-click on your dialog box background.
2. From the Dialog-Box Builder, select Dialog Box, point to Export, and then select Command File.
Your dialog box is saved in the command file Force_Control.cmd in the current working directory.