About the Toolbars
The Adams Insight toolbars appear at the top of the window by default. (Learn how to move the toolbars to other parts of the window.) The tools in the toolbars are arranged in the order that you use them in the process of creating and executing your experiment. Depending on where you are in the process of creating an experiment, Adams Insight enables or disables the tools. This feature alerts you to the correct order of procedures to follow. For example, the Run simulations tool is disabled until you define the required elements for a design matrix.
The Adams Insight main window has the following toolbars:
Experiments Toolbar
The Experiments toolbar lets you execute basic commands. It includes the following tools:
Tool: | Purpose: | Description: |
|---|---|---|
 | New | Creates a new experiment. |
 | Open | Opens an existing experiment. |
 | Save | Saves your current experiment. |
 | Delete | Deletes the selected item. |
Experiment Contents Toolbar
The experiment contents toolbar helps you build and execute your experiment. It includes the following tools:
Tool: | Purpose: | Description: |
|---|---|---|
 | Add Factor | Creates a new factor in your experiment and displays the Factor Form for you to complete. |
 | Add Response | Creates a new response in your experiment, and displays the Response form for you to complete. |
 | Promote | Promotes items to the inclusion list. From the Candidates section of the treeview, select the factor(s) and/or response(s) that you want included, and select the Promote tool. The items are moved from Candidates to Inclusions, and are now part of your design matrix. |
 | Demote | Demotes items to the candidates list. From the Inclusions section of the treeview, select the factor(s) and/or response(s) that you want excluded, and select the Demote tool. The items are moved from Inclusions to Candidates, and are no longer part of your design matrix. |
 | Tie Factors | Ties factors together. Learn about on tying factors. |
 | Untie Factors | Unties factors. Learn about Tie Factors. |
 | Create Design Specification | Sets the design specifications for your experiment. Learn about the Design Specification form. |
 | Create Work Space | Creates the work space for your experiment. Learn about the Design Work Space form. |
 | Run Simulation | Runs the simulation for each trial in your work space matrix. |
 | Fit Results | Fits the results of your experiment. Learn about fitting results. |
 | Export | Exports the results from your experiment to a file using these file formats: ■HTML - Creates an HTML-format Web page ■SYLK - Creates a symbolic Link (SYLK) format spreadsheet file ■Visual Basic - Visual Basic subroutines ■MATLAB - MATLAB M-File |
 | Optimize | Optimizes your experiment. Learn about Optimize Model or Experiment. |
 | Export To ODYSSEE | Insight experiment is exported to ODYSSEE CAE Lunar in order to create a Reduced Order Model (ROM) from the Adams simulation trials. This process involves the following steps: ■Saves the experiment, closes Insight and returns to Adams Car ■Writes an Event file (Adams Car) ■Reads the Factor & Response Inclusions from the experiment file and writes an output file for ODYSSEE to consume (adamsCar_parser.json). ■Opens ODYSSEE CAE Lunar and populates ODYSSEE’s Car Parser tool. This is compatible with ODYSSEE CAE version 2024.1 and higher. This button is enabled only when there are Inclusions for Factors and Responses. This button is currently disabled for the Linux platform and insight application launched through Aview or standalone Insight application. Also, Design Objectives, Event factors and Tie Factors are not yet supported. |
Work Space Toolbar
The work space toolbar lets you execute commands on the work space. It includes the following tools:
Tool: | Purpose: | Description: |
|---|---|---|
 | Work Space Display | The Work Space is a matrix with the rows indicating the runs and the columns identifying the factor settings and resulting response values in engineering units. It is sometimes referred to as the run matrix. Learn more about Design Work Space |
 | Work Space Review | The Work Space Review allows you to perform preliminary investigations of the raw data from the work space. This can be achieved by graphically reviewing the histograms which depict the distribution of the column values. Learn more about Design Work Space Review. |
 | Work Space - Scatter Plots | Allows you to view the raw data plotted against another variable. You can also plot the raw values against the trial count. |
 | Work Space Correlation Matrix | Correlation can be used to measure the potential strength of relationship or lack of relationship between two variables. Learn more about: Work Space Correlations. |
 | Work Space Column Calculator | Enables you to perform mathematical operations on the columns of an existing workspace. Learn more about: Work Space Column Calculator. |
Report Toolbar
The report toolbar lets you generate and export a report. It includes the following tools:
Tool: | Purpose: | Description: |
|---|---|---|
 | Create snapshot | Take a picture of the active application window and save it to an image file. |
 | Display last exported item | Display the last saved or exported file. For example, if you just saved the experiment, using this tool displays the .xml file in a browser. If you just exported a work space, use this tool to display the work space .csv file in your default spreadsheet program. |
Setting Up Toolbars
You can turn the display of the toolbars on or off and set where they appear. By default, all toolbars are displayed at the top of the window. To set the placement of these objects, see Moving Toolbars.
To turn a toolbar on or off:
1. Right click one of the toolbars in the top of the window to display the toolbar selection menu.

This item in the selection menu: | Controls this toolbar: |
|---|---|
Experiments | 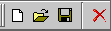 |
Experiments Contents |  |
Work Space |  |
Report |  |
2. Select the item from the toolbar selection menu:
■If the item is not currently displayed (no checkmark in the menu), it will now display in the window.
■If the item is currently displayed (with a checkmark in the menu), it will be turned off.
Moving Toolbars
You can move the Adams Insight toolbars to other areas of the screen.
To move a toolbar:
1. Put your cursor on the divider for the toolbar you want to move.
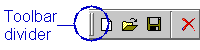
2. Drag the cursor until the toolbar is at the desired location.