Animation Dashboard - View
Animation dashboard -> View tab
Lets you set the display of animations in the Viewports.
For the option: | Do the following: |
|---|---|
Display Icons | Select to display Screen icons during animations. Displaying icons can be very helpful when debugging your model. For example, displaying screen icons during animations allows you to see if joints or forces applied to parts are behaving as expected because you can see their icons move as the animation progresses. Displaying screen icons can also help you see how markers move during animations because they control the locations and directions for constraints and forces. Note that if you import your animation through a Graphics file (.gra) only, you do not have joint or force icons. |
Perspective | Select to change the depth of the screen to perspective projection. Perspective projection causes a vanishing point effect by showing the size of parts relative to their distance from the viewer. It does not show the true proportions of all parts. (By default, Adams PostProcessor displays your animation or three-dimensional plot as though it were drawn on a flat piece of paper. This is called orthographic projection.) Learn more about Setting the View Perspective. |
Title | Select to display a title for the animation in the upper left corner of the viewport. It displays the name of the model and the current frame number. During the animation, it displays the time. 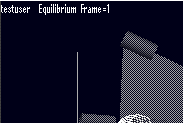 |
FPS Title | Select to add the number of frames per second to the end of the title. |
Display Triad | Select to display a triad that displays the orientation of the global coordinate system axes:  It appears in the lower left corner of a viewport. As you move the view of a viewport, the triad displays the changes to the coordinate system orientation. |
Light Intensity | Set to the amount of overall intensity of the light (much like setting a dimmer switch in your home). |
Ambient Light | Set to the amount of background, ambient light to control the diffusion of light sources to affect the amount of lighting on edges. |
Light Angle | Use the Light Angle slider to set how far from the center line the light source is. |
Light Reflections | Select to have reflections off of parts. (Note that this is computationally expensive and can slow down your animations.) |
Two-Sided Lighting | Clear to set up one-side lighting. The default is two-sided lighting. |
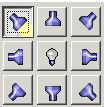 | Use the light buttons on the right side of the dashboard to turn on different focused light sources. Click a light button on the left to see examples of different lighting. Note: The number of light sources you can select depends on the graphics driver and system you are using. If you selected OpenGL, the number of light sources depends on your graphics card. For more information on selecting graphics drivers, see Running and Configuring Adams. |