Using Adams SmartDriver
To run a SmartDriver analysis you need to provide a model drive and path to follow. In addition, you can select two different cruising modes:
■vehicle_limits - Drive the vehicle at maximum speed possible
■user_defined - Use only a defined percentage of the vehicle capabilities
The easiest way to submit an Adams SmartDriver analysis is to use the SmartDriver dialog box. To submit an analysis, from the Simulate menu, point to Full-Vehicle Analysis, and then select Adams SmartDriver. The following example shows how to run an ISO lane change maneuver using the vehicle limits option.
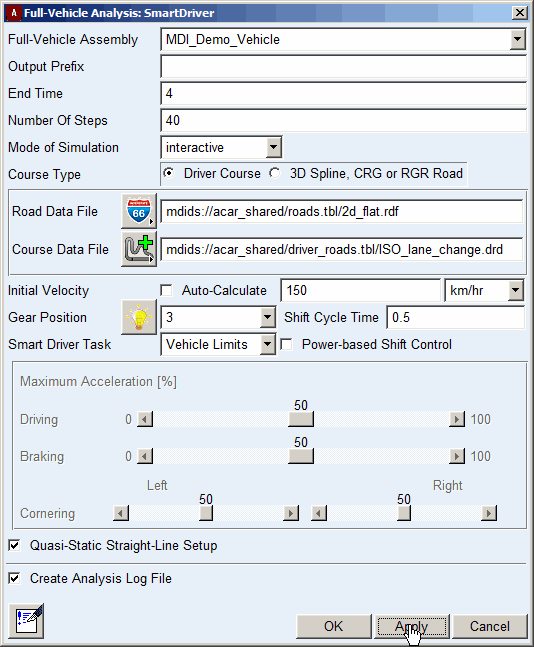
In the example above, the initial speed and gear are set to 150 km/hr and 3rd gear.
Adams Solver automatically generates path graphics using the path description defined in the course file.
You can run a target performance analysis by changing the Smart Driver Task to user_defined and specifying desired performance scale factors for driving, braking, and right-hand and left-hand turns.
Modifying the Event File
The SmartDriver analysis submission produces an event file in XML format. You can open this file in Event Builder to refine parameters that are not accessible using the SmartDriver analysis dialog box, for example, gear shift timing parameters or the RPM control.
Executing an Event File Dialog Box
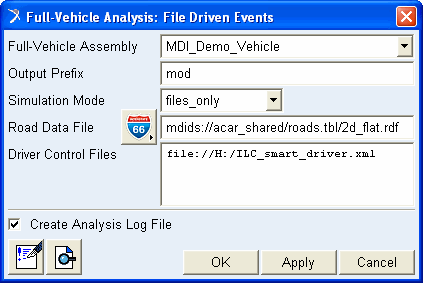
You can execute the modified event file using the File Driven Events dialog box. To execute an event, From the Simulate menu, point to Full-Vehicle Analysis, and then select File Driven Events.
The following example shows how to run an event file. In this case, no automatic generation of the path graphics (for example of a drd file) occurs.
In this mode, you can submit multiple SmartDriver-based analyses with a single click. Modifying the event file you can, for example, switch the target path to a modified version with reduced curvature peaks (corner cutting), run a new analysis, and then compare the two results:
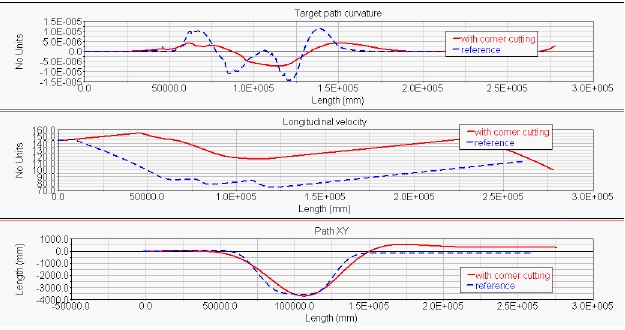
Obviously, when the path is smoother, SmartDriver can drive the vehicle faster.