Customizing Dialog Boxes Using the Dialog-Box Builder
Adams View uses dialog boxes that contain a variety of Interface objects, such as labels, fields, buttons, and more. You can use the Adams Dialog-Box Builder to create and modify dialog boxes to better suit your needs and preferences. For example, you can add a new button to a standard dialog box that selects options you commonly use, or create a new dialog box to execute special procedures you run often, including one or more macros.
Note: | You cannot customize all Adams View dialog boxes and tools. For example, you cannot customize the Plugin Manager or the Information window. The Dialog-Box Builder's Dialog Box -> Open menu provides access to those dialog boxes, containers, and toolbars that you can customize. |
Creating Dialog Boxes
To create a dialog box:
1. On the Tools menu, point to Dialog Box, and then select Create.
The Dialog-Box Builder appears.
2. On the Dialog Box menu in the Dialog-Box Builder, select New.
3. Enter the library to which the new dialog box should belong. By default, it belongs in the library .gui.
4. In the Name text box, enter a title for your dialog box.
5. Select any predefined buttons you'd like on your dialog box.
6. Select OK.
A new dialog box appears.
Modifying Dialog Boxes
Once you create a dialog box, the Dialog-Box Builder changes to modify mode. You can then add a variety of interface objects to the dialog box, as well as customize the layout, appearance, commands, and size of the objects in the dialog box.
Note: | You cannot customize all Adams View dialog boxes and tools. For example, you cannot customize the Plugin Manager or the Information window. The Dialog-Box Builder's Dialog Box -> Open menu provides access to those dialog boxes, containers, and toolbars that you can customize. |
To modify an existing dialog box:
1. On the Tools menu, point to Dialog Box, and then select Modify.
The Database Navigator appears.
2. Select the desired dialog box.
The Dialog-Box Builder appears.
3. Modify the dialog box as desired.
Tip: | After displaying a dialog box from the Tools menu, you can double-click the background of a displayed dialog box to display the Dialog-Box Builder and modify the dialog box. |
Renaming Dialog Boxes
To rename a dialog box:
The Database Navigator appears.
2. Select the desired dialog box by double-clicking the name. The Dialog-Box Builder appears.
3. From the Dialog Box menu, select Rename.
4. Enter a new name for the dialog box.
5. Select OK.
Adding Interface Objects to Dialog Boxes
Learn about:
Adding Objects
You can add Interface objects to your dialog box.The instructions for adding objects to your dialog box are the same for all types of objects.
To add interface objects to a dialog box:
2. Place the cursor in the dialog box to which you are going to add the object.
3. Hold down the left mouse button and drag to create your object.
You can also click the left mouse button, and Adams View creates an object of default size.
Example of Adding an Object to a Dialog Box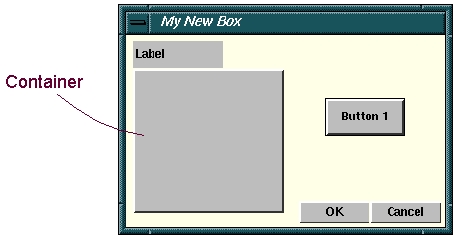
Adding Predefined Objects
You can add more standard buttons to your dialog box even after you've created several using the Predefined menu. For example, if you did not place an Apply button on your dialog box and would like to add one after you created your dialog box, you can do so from the Predefined menu.
To add a predefined object:
■On the Create menu, point to Predefined, and select a predefined object to add.
Adding Images
You add an image to your dialog box just as you add a label. The image format for the label must be:
■Motif - .xbm (X BitMap) or .xpm (X PixMap)
■Windows - .bmp (must be a 16-color bitmap)
You cannot size the image in the Dialog-Box Builder. Therefore, if you want to fill the entire dialog box, you'll need a very big image.
For sample images, see the directory /install_dir/aview/bitmaps where install_dir is the directory where you installed your Adams products.
To add an image:
1. On the Create menu, select Label.
2. Draw the label so it fits the size of the image.
3. Double-click the label to activate it.
4. From the option menu, select Appearance.
5. Clear the value in the Label Text box.
6. In the Icon File box, enter the path to and name of the image.
7. From the Justified option buttons, select the alignment for the image.
8. Select Apply.
Tip: | To see the image, you may need to select Test Box from the Options menu. |
Moving Interface Objects
You can move Interface objects:
■Using the mouse.
■By entering coordinate locations in the Dialog-Box Builder.
■Using the Arrow tools  in the Dialog-Box Builder. The tools move objects to the edges of the dialog box or to the edges of other objects. The tools are located along the top of the Dialog-Box Builder.
Learn about Setting Distance Between Interface Objects.
To move objects using the mouse:
1. Select the object to move by clicking it. If you want to select more than one object, hold down the left mouse button and drag across all the objects you want to select.
You can also click the middle mouse button to select more objects.
2. Hold down the left mouse button, with the cursor over a selected object, and move the mouse in the direction you want to move the object.
The selected object or objects move as you move the mouse.
To move objects using coordinate locations:
1. Select the object to move by clicking it.
2. On the Edit menu, select Attributes to load the object’s attributes for that object into the Dialog-Box Builder.
You can also double-click on the object to select and load its attributes at the same time.
3. If it is not already selected, set Attributes to Layout.
4. In the Left: and Top: boxes, enter your coordinate values. The lower the value, the closer your object is to the upper left corner of your dialog box or container.
5. From the Units option buttons, select the type of locations you entered in Step 4. You can define the location of the objects by entering absolute pixel locations (Absolute) or relative locations (Relative) as a percentage of the parent object.
6. Select Apply.
To move objects using the Arrow tools :
1. Select the object or objects to move.
2. Select the Arrow tool indicating the direction in which to move your object.
The object moves next to the edge of the dialog box. If another object is in the way, the selected object stops next to that object.
Resizing Interface Objects
Adams View provides several ways to resize your Interface objects, as described below. The tools are located along the top of the Dialog-Box Builder.
To increase the size of objects using the last four arrow icons  on the Dialog-Box Builder toolbar:
1. Select the object(s).
2. Click on the arrow icon indicating the direction in which you want to increase your object(s).
To resize objects in small increments using the mouse:
1. Double-click on the object.
Adams View selects the object and displays reshaping handles around it.
2. Increase or decrease the size of your object by moving the reshaping handles.
To resize objects by entering measurements in the Dialog-Box Builder:
1. Select the object.
2. On the Edit menu, select Attributes to load the object’s attributes for that object into the Dialog-Box Builder window.
You can also double-click on the object to select and load its attributes at the same time.
3. Set Attributes to Layout, if it is not already selected.
4. Enter measurements in the Width: and/or Height: boxes.
5. Select Apply.
To make two or more objects the same height or width with respect to the first object you select:
1. Select the objects. The height and width are with respect to the first object you select.
2. Select one of the following:
■Height tool  to make objects the same height.
to make objects the same height.■Width tool  to make objects the same width.
to make objects the same width.To make two or more objects identical in size, as well as align them:
1. Select the objects. The alignments are with respect to the first object you select.
2. Select one of the following:
■Horizontal Alignment tool  to make the objects identical in size and align them horizontally.
to make the objects identical in size and align them horizontally.■Vertical Alignment tool  to make the objects identical in size and align them vertically.
to make the objects identical in size and align them vertically.Aligning Interface Objects
You can use the Alignment tools  to align Interface objects with respect to the first object you select. The tools are located along the top of the Dialog-Box Builder.
to align Interface objects with respect to the first object you select. The tools are located along the top of the Dialog-Box Builder.
To align dialog box objects:
1. Use the middle mouse button to select one or more objects.
2. Select the appropriate alignment tool.
Setting Distance Between Interface Objects
In the Dialog-Box Builder, you can specify the distance between Interface objects and their distance from the border of the dialog box.
To set distance between objects:
1. From the Preferences menu on the Dialog-Box Builder, select Separation.
2. Enter a value for Horizontal and Vertical Border Width to specify the distance from the object to the dialog box border.
3. Enter a value for Horizontal and Vertical Separation to specify the distance between other interface objects.
Restricting the Size and Position of Interface Objects
In the Dialog-Box Builder, you can restrict the size and position of Interface objects by using the Snap Grid option. It works similar to the grid in the modeling window. When you drag an item with the mouse to move or resize it, the mouse position will snap to the nearest grid point.
Note: | Because the snap grid points are not visible, and the default grid is very fine (2 pixel distance), snapping is not very noticeable by default. |
To restrict the position and size of objects:
1. On the Preferences menu on the Dialog-Box Builder, select Snap Grid.
2. Enter values for the Horizontal and Vertical Grid Spacing to set the spacing distance between grid points.
3. Enter values for the Horizontal and Vertical Grid Offset to set where to begin snap grid points from the top and left borders.
Deleting Interface Objects
To delete interface objects from a dialog box in the Dialog-Box Builder:
1. Select the interface object you want to delete.
2. On the Edit menu in the Dialog-Box Builder, select Delete.
Adding Online Help to Your Dialog Box
You can add an online help file to your dialog box by linking an HTM or HTML file to your customized dialog box
Note: | The following steps only include instructions for linking your dialog box to a help file; they do not explain how to create HTML help files. Refer to HTML reference guides. |
To attach a help file to your dialog box:
1. From the Attributes option menu, select Help.
2. In the Tip Text text box, enter the text you want displayed in the Status toolbar (at the bottom of the Adams View window) when your dialog box is open.
3. In the Help File text box, enter the complete path and file name of your help file.
Note: | You do not need to complete the Help Link text box. It is used for backward compatibility only. |
Using Commands in Dialog Boxes
Most objects have commands that Adams View executes when the object changes or a user selects it. These commands do the real work of the interface, changing your model or changing the interface as users enter data and make selections.
Learn more about using commands in dialog boxes:
Viewing and Generating Object Commands
You use the Adams View command language to create commands for objects. You can use the Command Navigator to find the commands you need. Once you find the commands, copy the commands from the command window or log file, and paste or type them in to the command text box for the dialog box object.
You can view and edit the commands in an existing dialog box. Some objects have more than one set of commands. Push buttons, for example, have commands for a single-click and additional commands for a double-click. Note that single commands are executed even on double-click. Windows, dialog boxes, and containers also have special sets of commands which are described below.
To view the commands for an object:
1. Double-click an object containing the commands you want to view.
2. From the Attributes pull-down menu, select Commands.
Substituting Text into Commands
Before executing the commands, Adams View performs several types of text substitutions. These substitutions let you include values from interface objects into commands. For example, you can include a value a user has entered in a text box.
Include identifiers starting with the symbol $, to indicate where to substitute text. There are four kinds of substitutions:
$object_name | $object_name refers to an interface object whose name is the same as object_name. When Adams View executes the command, it substitutes the current value of object_name for $object_name. For example, $my_field substitutes the value of the interface object my_field. The following table lists the values for different interface objects: IFor example, to include the contents of the field my_value in a command, you enter: my_command my_parameter = $my_value If the field contains 123, then Adams View executes the command: my_command my_parameter = 123 By default, the value of an option menu or radio box is the text of the displayed or selected button. By default, the value of a toggle is on or off. You can specify other values for Adams View to substitute. In the toggle button Value attributes, there are fields to set the toggle values. In the Option Menu and Radio Box Value attributes, you can add a substitution value after the text for each choice, separated by a vertical bar "|". The values do not affect the displayed text; they are only used in commands. | |
The Object: | Has the value: | |
Field | Contents of field | |
Option-menu | Selection of value for current selection | |
Radio-box | Selection or vale for current selection | |
Toggle button | On/off or specified on/off value. | |
Slider | Integer slider value | |
$_value | $_value substitutes the value of the object that contains the command. For example, if the commands are on a button named my_toggle, $_value is the same as $my_toggle. Another example might be if you want to create a toggle button that returns a value of "1" or "0". You would do so with commands like the following: if condition=($_value) ! commands executed when user turns on toggle else ! commands executed when user turns off toggleend Wherever possible, you should use $_value instead of the name of the actual object because it is easier to understand and maintain since it does not rely on the name of the object holding the command. If you see $_value in a command, you know immediately that it refers to the value of the interface object. In addition, if you change the name of the object, you do not need to change the commands. You will find this especially helpful for toggle buttons, radio boxes, and option menus, where you almost always want the value of the object in the associated commands. | |
$_self, $_parent, $_topgui | These substitute the name of the object executing the commands, the object's immediate parent, or the parent dialog box, window, or toolbar. When Adams View executes the commands, it substitutes the full database name of the appropriate object. $_self, $_parent, and $_topgui help you make your dialog boxes easier to read and maintain. For example, a dialog box can load one of its child fields with this command: interface field set field=$_self.myfield strings=... If you use this command and you rename the dialog box, you don't have to change the command. Wherever possible, it's a good idea to make your object names refer to $_self or $_parent rather than literal full names. Note that $_value and $_self are different, but easy to confuse. $_value inserts the value of the object, $_self inserts the name of the object. | |
$_1, $_2, $_3,... | These refer to parameters passed with a window or dialog-box display command. The window or dialog-box, and any child of the window or dialog box, can include $_1,... in the commands. When Adams View executes the commands, it substitutes the current value of the parameter. This allows you to pass information to a window or dialog box as you display it. You might, for example, pass the name of an object to a dialog box. Commands executed by the dialog box or objects in the dialog box can then refer to this object. | |
$_1, $_2, $_3,... | These refer to parameters passed with a window or dialog-box display command. The window or dialog-box, and any child of the window or dialog box, can include $_1,... in the commands. When Adams View executes the commands, it substitutes the current value of the parameter. This allows you to pass information to a window or dialog box as you display it. You might, for example, pass the name of an object to a dialog box. Commands executed by the dialog box or objects in the dialog box can then refer to this object. | |
Conditional Command Expansion
Back quotes contain a conditional substitution. If any $name or $value substitution inside the quotes is empty, then Adams View removes the text between the  . $name is empty if the text returned is empty (
 ) or if the object is disabled or not displayed.
. $name is empty if the text returned is empty () or if the object is disabled or not displayed.Conditional substitution makes it easier to handle optional or mutually-exclusive parameters in commands. For example, if you use a command such as the following and the user does not supply a value, the command fails:
my_command my_parameter = $my_value ...
Instead, if you use a command like the following Adams View only includes my_parameter = $my_value, if the user has entered a value:
my_command  my_parameter = $my_value
 ...
...
my_parameter = $my_value ...The same technique handles mutually-exclusive parameters. As long as the parameters are wrapped in  , and only one option is displayed or enabled at a time, the command only includes the displayed parameter.
, and only one option is displayed or enabled at a time, the command only includes the displayed parameter.Example
Conditional expansion allows for the commands for custom interface objects to ignore parameters in which the user does not enter any value. Back quotes [ parameter=value
 ] indicate parameters that will be collapsed when the command is executed. This makes the resulting custom interface object easier to use and relieves you from having to handle error checking for empty fields.
parameter=value] indicate parameters that will be collapsed when the command is executed. This makes the resulting custom interface object easier to use and relieves you from having to handle error checking for empty fields.The Easy Beam Properties custom dialog box below shows how conditional expansion can be used.
The command for this dialog box modifies the indicated beam's properties as shown below:
force modify element_like beam &
beam_name = $f_beam_name &
youngs_modulus = $f_youngs_modulus &
shear_modulus = $f_shear_modulus &
damping_ratio = $f_damping_ratio
The problem with this configuration is that the user must enter all of the fields in the dialog box or the entire command fails. For example, if the user left the Damping Ratio Field blank, its command would fail with the following error:
ERROR: ---------------------------------------
ERROR: Invalid input. Enter a number.
ERROR: The command was not executed.
ERROR: &> damping_ratio =
ERROR: -------------------------------
If the command is modified to incorporate conditional expansion, the user could leave fields blank without affecting the execution of the command.
To add the conditional expansion, you add back quotes ( ) for each parameter. The resulting command looks like the following:
) for each parameter. The resulting command looks like the following:force modify element_like beam &
beam_name = $f_beam_name &
 youngs_modulus = $f_youngs_modulus
 &
&  shear_modulus = $f_shear_modulus
 &
&  damping_ratio = $f_damping_ratio
Now the command can handle blank fields. For example, if the user of the dialog box leaves the Shear Modulus field blank with the new command, the following command is executed:
force modify element_like beam &
beam_name = .model_1.ebm_beam4 &
youngs_modulus = 2.07E+05 &
damping_ratio = 1.0E-02
Adams View did not include the parameter for the blank field.
Conditional expansion is valid for all parameter types in addition to fields that can return no value. Conditional expansion can be included for none, some, or all parameters in a command. In the example above, the beam_name parameter is required by the command, so the single quotes are not included.
Special Commands for Windows, Dialog Boxes, and Containers
Windows, dialog boxes, and containers have special sets of commands: start, execution, and finish commands. Adams View automatically executes start commands when the object is displayed and automatically executes finish commands when an object is undisplayed. Execution commands are executed by the interface dialog_box/window/container execute command.
Start and finish commands help you initialize settings and put default values into fields when an interface object is displayed. If necessary, finish commands also allow you to clean up when the object is not displayed.
Execution commands are not required, but are a useful place to put a set of commands that several objects can execute. The default OK and Apply buttons use execution commands, for example.
Example
You can display windows and dialog boxes with a list of parameters. These parameters can be used by the interface objects and commands within that interface object. The parameters are passed as quoted text strings into the interface object.
Once the window or dialog box is displayed, it can make use of these parameters in its own commands. These parameters are automatically assigned the special names $_1, $_2, ..., $_n, for each parameter that is passed to it.
This functionality is especially useful for specifying default values for fields or other interface objects in the new window or dialog box. For example, a button labeled Easy Beam Size has been added to the custom Easy Beam Properties dialog box. The button contains commands that display a new dialog box for further modification of a beam:
The name of the beam is passed to the new dialog box so that it automatically loads the relevant parameters. The command for the Easy Beam Size button is:
interface dialog_box display &
dialog_box_name = .gui.db_beam_size &
'parameters="$f_beam_name"'
In addition to specifying the name of the dialog box to open, the command also specifies a parameter to pass to the new dialog box.
The start command for the new Easy Beam Size dialog box uses this passed parameter to automatically load the current values for the beam as shown below:
if condition=("$_1" != "")
interface field set field_name=$_self.f_beam_name str="$_1"
end
if condition=("$f_beam_name" != "")
interface field set &
field_name=$_self.f_length &
database_field="$f_beam_name.length"
interface field set &
field_name=$_self.f_area_of_cross_section &
data_base_field="$f_beam_name.area"
interface field set &
field_name=$_self.f_i_marker_name &
database_field="$f_beam_name.i_marker_name"
interface field set &
field_name=$_self.f_j_marker_name &
database_field="$f_beam_name.j_marker_name"
end
The if statements check to see if the passed parameter "$_1" contains a value. If a value is found, the interface field set command loads with the name passed from the calling interface object (in this case, the name of the beam). The second if statement checks to see if the field was set to a beam name. If so, it gets the current values for the beam and sets the appropriate fields.
Window and dialog box parameters are useful tools for communicating information between interface objects. To pass multiple parameters, separate them with commas, as in the following example:
interface dialog_box display dialog_box=my_dialog_box
parameters="parameter1", "parameter2", "parameter3"
When the new dialog box appears, it has access to those parameters as $_1, $_2, and $_3, respectively.
Editing Commands
Holding down the right mouse button over the Commands area of the Dialog-Box Builder displays a shortcut menu with several options for editing the commands as shown in the table below.
The command: | Does the following: |
|---|---|
References | Displays and inserts the available $xxx references. |
Pick | Lets you select an object and insert selected name into commands. |
Browse | Displays the Database Navigator and inserts selected name into commands. |
Cut | Removes selected text and places it in the system clipboard. |
Copy | Copies selected text to system text buffer. |
Paste | Pastes from system clipboard to cursor location or over selected text. |
Edit | Displays the text editor vi (by default) with text loaded (Linux only). |
Testing Your Dialog Box
You can test the execution of your dialog box without saving it to your database.
To test your dialog box changes:
1. On the Options menu, select Test Box.
Adams View displays the dialog box without any object highlighting.
2. Execute your dialog box as desired.
Saving and Reloading Custom Dialog Boxes
Saving your dialog boxes as Adams View command files is the most reliable way of ensuring that your custom dialog boxes are upwardly compatible with new versions of Adams View.
To save your dialog box:
Note: | You can also save your dialog box by saving your modeling database as a binary file. All of your changes are saved if you save a binary file. |
Before you reload your dialog box, note that Adams View does not allow the command file to create interface objects with the same names as objects that already exist in the database. You must delete or rename to read in the command file.
This is the most reliable way of ensuring your custom dialog boxes are upwardly compatible with new versions of Adams.
To reload your custom dialog box:
■On the File menu, select Import, and then read in the desired command file.
Displaying Dialog Boxes
You can display dialog boxes using the Database Navigator. Standard Adams View dialog boxes are listed first, in alphabetical order, followed by your custom dialog boxes.
1. On the Tools menu, point to Dialog Box, and then select Display.
The Database Navigator appears, listing all dialog boxes.
2. Select the desired dialog box, and then select OK.
As an alternative, you can create a menu that displays your dialog boxes. For more information, see Customizing Menus Using the Menu Builder.
Exiting the Dialog-Box Builder
To exit the Dialog-Box Builder:
■From the Dialog Box menu of the Dialog-Box Builder, select Exit.
The Dialog-Box Builder exits but Adams View still displays your custom dialog box.