Displaying Plots as Tables
To help you better see a two-dimensional plot's numerical information, you can view a plot as an HTML table. In addition, you can always have your plots display as tables by setting a preference as explained in PPT Preferences - Plot dialog box help. The figure below shows a plot displayed as a table.
Learn more:
Notes: | You can still edit the data in the table in math mode as explained in Using Expressions to Modify Curve Data Points, although the independent data fields are not available. You print a table as you do a plot as explained in Printing Plots, Animations, and Reports. |
Changing a Plot to a Table
To change a plot to a table:
1. In the Treeview, select a two-dimensional plot.
Note: | Even though you toggled a plot to display as a table, the treeview still lists it as a plot and all of its columns as curves. |
Changing Table Properties
For tables, you can change the properties listed in the table below. You can also change the dependent column (curve data) properties as explained in Changing Dependent Column Properties.
Column headings | By default, Adams PostProcessor uses the curve legends as column headers for the table. You can also set Adams PostProcessor to display brief headers for the columns (for example, Column 1 instead of LEFT FRONT CONTACT MATCH MOTION_Z) and display a legend under the header that maps column names to data names. This is particularly helpful if you have long column headers and need to conserve space. Examples of Complete and Brief Headers for Tables |
General appearance of the table | You can set general properties for the table such as headers and font size. After you set up the headers, you can change their justification and text as explained in Adding Notes and Modifying Text. |
Display of the independent column | You can turn off the display of the independent column and change the display of its contents (trailing zeros, scientific notation, and so on). |
To change table properties:
1. Select a table.
Note: | Even though you toggled a plot to display as a table, the treeview still lists it as a plot and all of its columns as curves. |
3. Set the header:
■To have Adams PostProcessor automatically generate a header, select Auto Header.
■To create your own titles and subtitles, clear the selection of Auto Header, and in the Header box, enter the text for the header.
Note: | You may want to expand the width of the Property Editor so you have more space for entering the text. To expand the Property Editor, point to the sash on its right border. When the cursor changes to a double-sided arrow, drag the cursor to increase the Property Editor's size. |
4. Set the general properties for the table as explained in the table below.
Curve Property Options
To set: | Do the following: |
|---|---|
Limits | Controls which rows are displayed in the table. Specify the start and end for values in the table (start and end are specified as values in the independent data column). Note that these limits are the axis limits on the independent axis. When you toggle back to a plot, they will be in effect on that axis. |
Row increment | Set the increment for the data to be included. For example, select 1 to include ever data point; select 5 to include every 5th data point. |
Alignment of values in columns | Set Alignment of Values to where you want to position the values in the columns. |
Size of the text | In the Font Size text box, enter a font size. The font type is always Helvetica. |
5. To add legend text and set the columns so they are brief, select Legend.
Adams PostProcessor adds a new row under the title containing the legend text.
6. To set the independent column properties, in the property editor, select Independent Column.
7. To remove the display of the independent column, clear the selection of On.
8. To change the legend for the independent column, enter the text in the Legend text box.
9. Set the numbering properties for the column as explained in the table below.
Independent Column Options
To set: | Do the following: |
|---|---|
Trailing zeros | Select Trailing Zeros to have Adams PostProcessor display zeros after the numbers in the table. The number of zeros depends on the number of decimal places you selected as explained next. |
Decimal places | In the Decimal Places text box, enter the number of decimal places to which the numbers in the table should be displayed. |
Scientific range | In the Scientific Range text boxes, enter the exponential form for scientific notation. This controls the lower and upper powers of ten where the format for real numbers switches from a fixed point format to scientific notation. The default values are -4 and 5, meaning that any number less than or equal to 1.0E-04 or greater than or equal to 1.0E+05 will be written in scientific notation. |
Changing Dependent Column Properties
You can change the way Adams PostProcessor displays the data in columns when you view a plot as a table. You can change it for each column individually.
To change column properties:
1. Select a column (curve).
Note: | Even though you toggled a plot to display as a table, the treeview still lists it as a plot and all of its columns as curves. |
2. Set the properties for the columns as explained in the table below.
Column Options
To set: | Do the following: |
|---|---|
Trailing zeros | Select Trailing Zeros to have Adams PostProcessor display zeros after the numbers in the table. The number of zeros depends on the number of decimal places you selected as explained next. |
Decimal places | In the Decimal Places text box, enter the number of decimal places to which the numbers in the table should be displayed. |
Scientific range | In the Scientific Range text boxes, enter the exponential form for scientific notation. This controls the lower and upper powers of ten where the format for real numbers switches from a fixed point format to scientific notation. The default values are -4 and 5, meaning that any number less than or equal to 1.0E-04 or greater than or equal to 1.0E+05 will be written in scientific notation. |
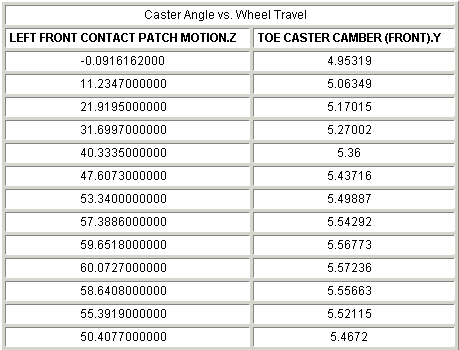
Examples of Complete and Brief Headers for Tables
Complete Headers
Caster Angle vs. Wheel Travel | |
LEFT FRONT CONTACT MATCH MOTION_Z | TOE CASTER CAMBER (FRONT) Y |
-0.0916152000 | 4.95319 |
11.2347000000 | 5.06349 |
21.9194000000 | 5.17015 |
31.6997000000 | 5.27002 |
40.3335000000 | 5.36 |
47.6073000000 | 5.43716 |
Brief Headers
Caster Angle vs. Wheel Travel | |
Column 1: LEFT FRONT CONTACT Column 2: TOE CASTER CAMBER | |
Column 1 | Column 2 |
-0.0916152000 | 4.95319 |
11.2347000000 | 5.06349 |
21.9194000000 | 5.17015 |
31.6997000000 | 5.27002 |
40.3335000000 | 5.36 |
47.6073000000 | 5.43716 |